Improve your Appwrite developer experience with dev keys_
Learn how you can create a dev key on Appwrite and use it in a web project to improve your developer experience.


When building applications with Appwrite, developers often need a way to test and debug services repeatedly over short periods. Sometimes, this can become a hassle, as Appwrite enforces strict rate limits on client apps to prevent abuse. Developers needed a way to bypass these rate limits in their test environments and CI/CD workflows to ensure the robustness of their app functionalities.
And this is the exact problem dev keys are here to solve!
What are dev keys?
Dev keys are a type of secret used by Appwrite's client SDKs. They allow the developer to bypass any rate limits enforced by Appwrite and suppress any CORS errors caused by not using a configured hostname. A developer can configure the expiration date of a dev key to any of the three preset options (1 day, 7 days, or 30 days).
Dev keys should never be used in production environments, as they can make your app more susceptible to abuse and security breaches.
Try out dev keys in an app
To test dev keys, I created a simple demo web app that sends 200 requests to create a new row in an Appwrite database. To set this app up, you must complete the following steps:
Step 1: Setup Appwrite project
First, create an Appwrite Cloud account or self-host Appwrite 1.7. Create a project (which will lead you to the project overview page) and head to the Databases page from the left sidebar. Create a new database with the ID testDb and a new table with the ID testTable. Store both of these IDs for future usage. In this table, add the following column:
| Name | Type | Required |
|---|---|---|
number | Integer | True |
Then, head to the Settings tab of the table, scroll down to the Permissions section, and add the following permissions:
| Create | Read | Update | Delete | |
|---|---|---|---|---|
| Any | False | False | False | False |
Lastly, return to the project overview page, head to the Settings page from the left sidebar, and copy your API endpoint and project ID for future usage.
Step 2: Create web app
Next up, we'll create our test app. This will require us to create two files in our working directory:
index.html
<!DOCTYPE html><html lang="en"><head>    <meta charset="UTF-8">    <meta name="viewport" content="width=device-width, initial-scale=1.0">    <title>Dev keys demo</title></head><body>    <h1>Dev keys demo</h1>    <p>Click on this button to add 200 rows to the database in less than 1 minute.</p>    <button type="button">Add rows</button>
    <!-- Appwrite Web SDK -->    <script src="https://cdn.jsdelivr.net/npm/appwrite"></script>
    <!-- Our app's script -->    <script src="app.js"></script></body></html>
app.js
const client = new Appwrite.Client()    .setEndpoint('https://<REGION>.cloud.appwrite.io/v1') // Your API Endpoint    .setProject('<YOUR_PROJECT_ID>'); // Your project ID
const tablesDB = new Appwrite.TablesDB(client);
document.querySelector('button').addEventListener('click', async () => {    const promises = [];    for (let i = 0; i < 200; i++) {        const promise = tablesDB.createRow({            databaseId: 'testDb', // Your database ID            tableId: 'testTable', // Your table ID            rowId: Appwrite.ID.unique(),            data: { number: i + i }        });        promises.push(promise);        console.log('Request initiated:', i+1);    }
    await Promise.all(promises);});
If you open the HTML page in your browser and click on the Add rows button, you will notice numerous errors in the console with the HTTP code 429, as Appwrite's rate limits allow one client to create 120 requests per minute for this API endpoint.
Step 3: Create dev key
Head back to your Appwrite project. On the overview page, select the Dev keys tab under the Integrations section and create a new dev key. You can add whatever name and expiry date you like.
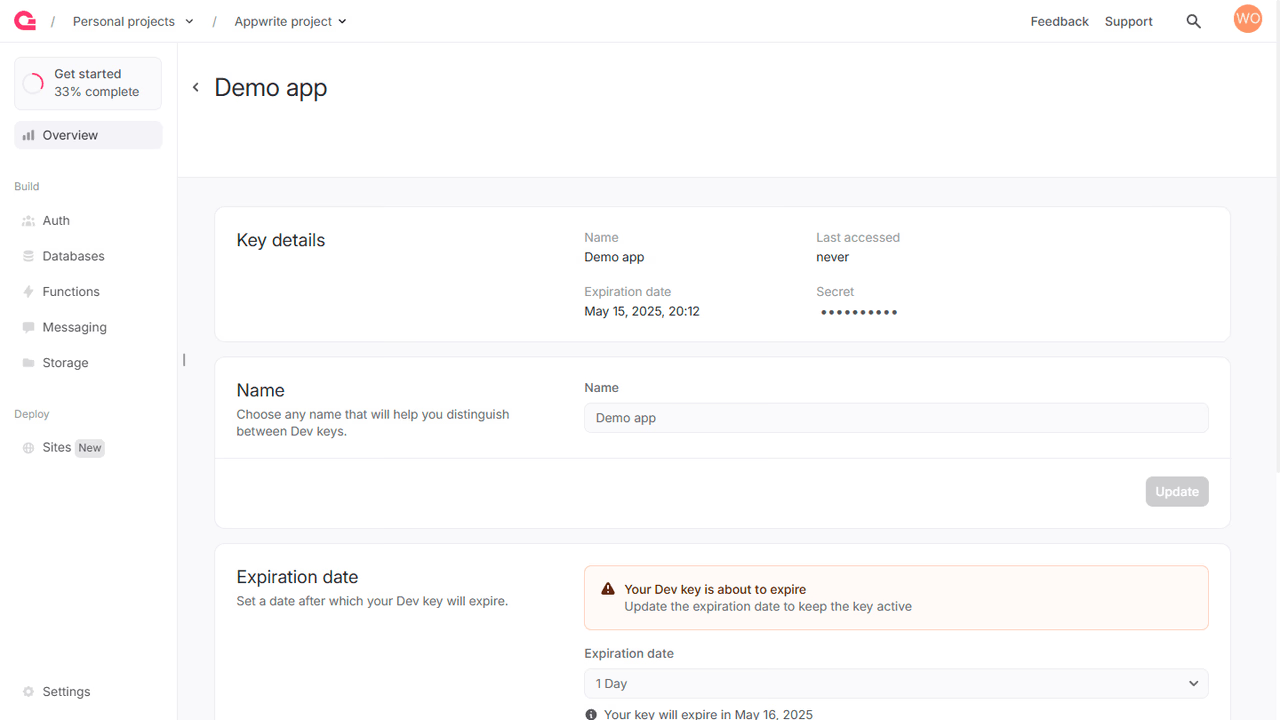
After creating this dev key, head to the app.js file and update the Appwrite client to the following:
const client = new Appwrite.Client() .setEndpoint('https://<REGION>.cloud.appwrite.io/v1') .setProject('<YOUR_PROJECT_ID>') .setDevKey('<YOUR_DEV_KEY>'); // Your dev keyStep 4: Test the app
Reopen the HTML page in your browser. Clicking the Add rows button will allow all 200 requests to execute successfully.
Next steps
And with that, you have successfully tested dev keys! Learn more about Appwrite by visiting the docs and joining the Discord community.