Start with React_
Build React apps with the Appwrite React library and add authentication, sign-in, sign-up, and user state in a few lines.
2 min read
Quick start agent prompt
Use this pre-built prompt with Cursor, Claude, or another coding agent to set up Appwrite for this guide. Copy it, preview it below, or open it directly in a supported tool.
Learn how to set up your first React project with the Appwrite React library.
1. Create project
Head to the Appwrite Console.
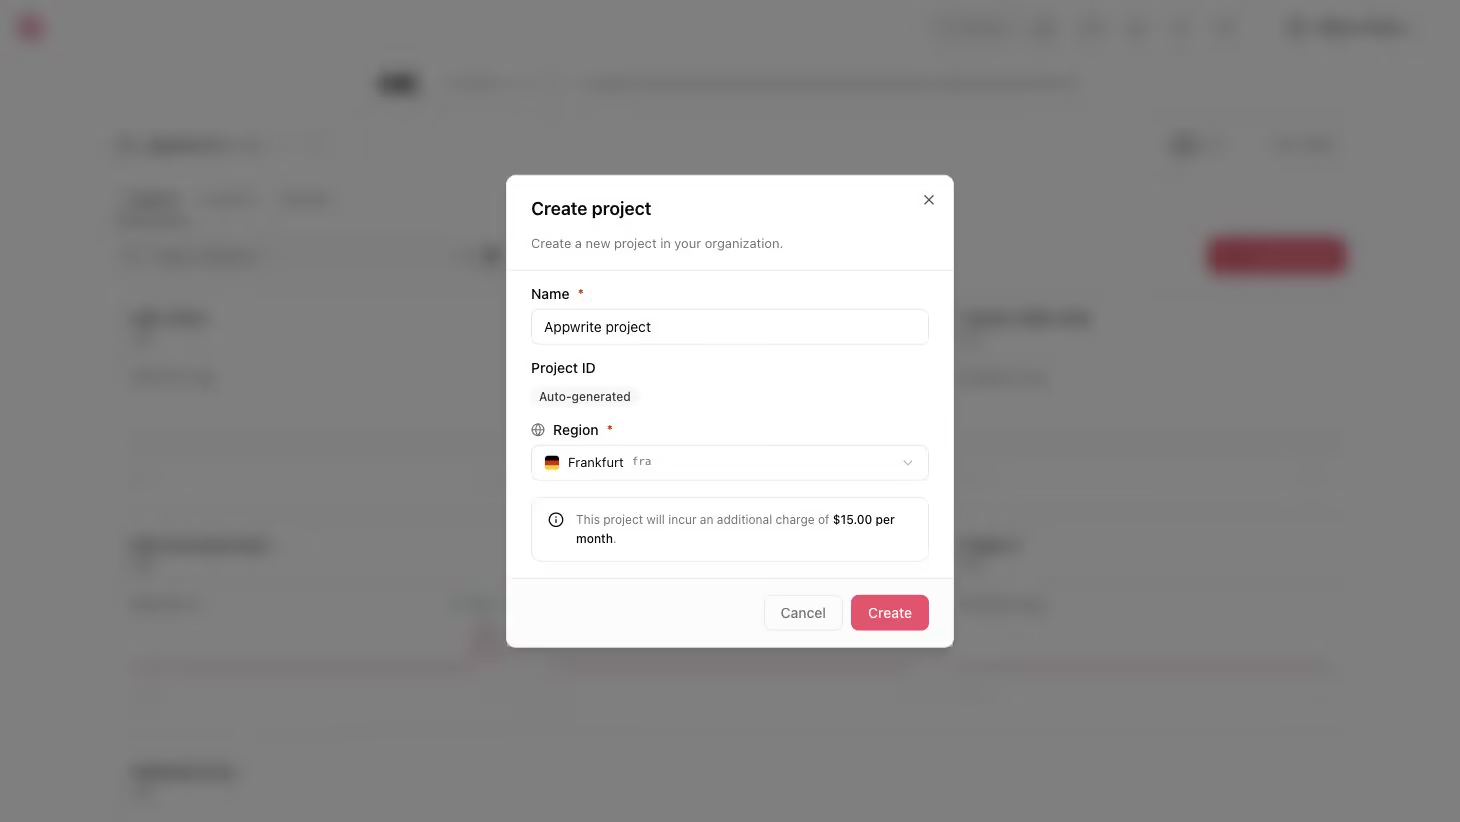
If this is your first time using Appwrite, create an account and create your first project.
Then, under Add a platform, add a Web app. The Hostname should be localhost.
Adding localhost as a platform lets your local app talk to Appwrite. For production, add your live domain to avoid CORS errors.
Learn more in our CORS error guide.
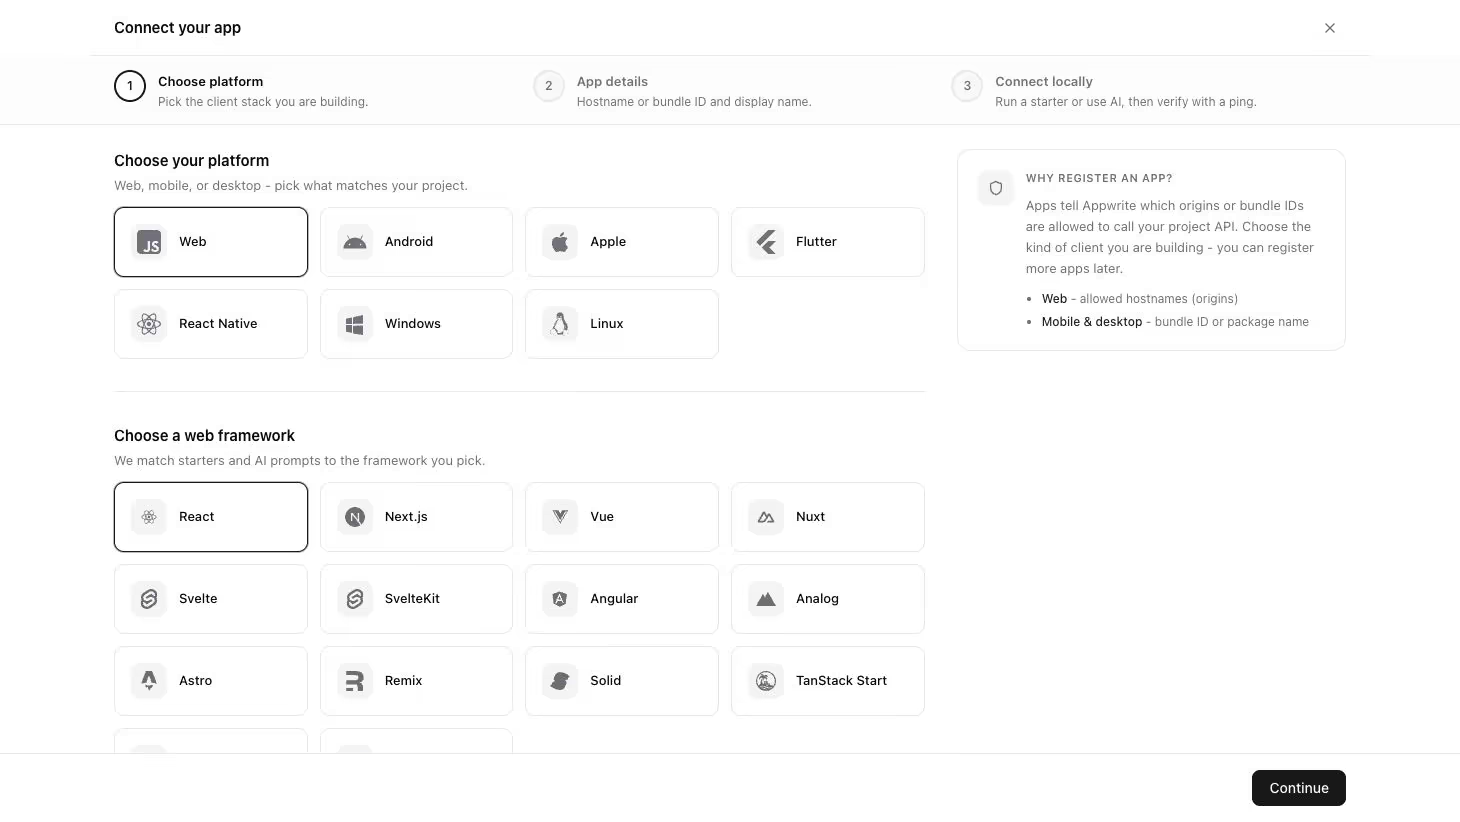
You can skip optional steps.
2. Create React project
Create a Vite project.
npm create vite@latest my-app -- --template react-ts && cd my-appnpm install3. Install the React library
Install the Appwrite React library along with the appwrite Web SDK and @tanstack/react-query peer dependency.
npm install @appwrite.io/react appwrite @tanstack/react-query4. Configure environment variables
Find your project's ID in the Settings page.
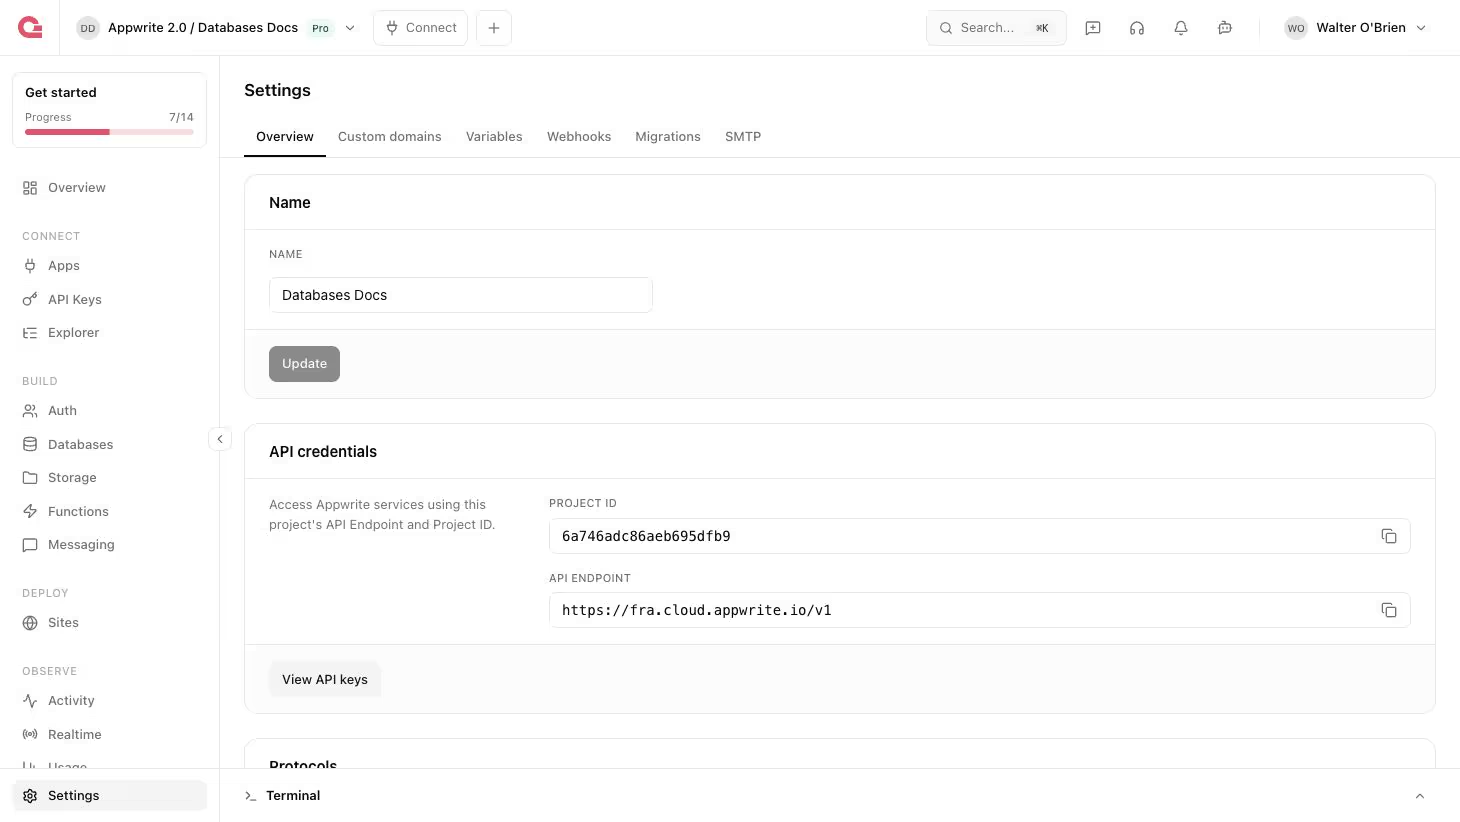
Create a .env file at the project root and add your endpoint and project ID. Replace <REGION> and <PROJECT_ID> with your own values.
VITE_APPWRITE_ENDPOINT=https://<REGION>.cloud.appwrite.io/v1VITE_APPWRITE_PROJECT_ID=<PROJECT_ID>5. Wrap your app with AppwriteProvider
Replace the contents of src/main.tsx with the following.
import { StrictMode } from "react";import { createRoot } from "react-dom/client";import { AppwriteProvider } from "@appwrite.io/react";import App from "./App";import "./index.css";
createRoot(document.getElementById("root")!).render(  <StrictMode>    <AppwriteProvider      endpoint={import.meta.env.VITE_APPWRITE_ENDPOINT}      projectId={import.meta.env.VITE_APPWRITE_PROJECT_ID}    >      <App />    </AppwriteProvider>  </StrictMode>,);
AppwriteProvider sets up the Appwrite Web SDK client and a per-instance TanStack Query cache so all hooks share the same auth state.
6. Add sign-up, sign-in, and sign-out
Replace the contents of src/App.tsx with the following.
import { useState } from "react";import { useAuth } from "@appwrite.io/react";
export default function App() {  const { user, isLoading, signIn, signUp, signOut, error } = useAuth();  const [email, setEmail] = useState("");  const [password, setPassword] = useState("");  const [name, setName] = useState("");
  if (isLoading) return <p>Loading...</p>;
  if (user) {    return (      <main>        <h1>Welcome, {user.name || user.email}</h1>        <button onClick={() => signOut.signOut()}>Sign out</button>      </main>    );  }
  return (    <main>      <input placeholder="Name" value={name} onChange={(e) => setName(e.target.value)} />      <input placeholder="Email" value={email} onChange={(e) => setEmail(e.target.value)} />      <input        placeholder="Password"        type="password"        value={password}        onChange={(e) => setPassword(e.target.value)}      />      <button        onClick={() => signUp.emailPassword({ email, password, name })}        disabled={signUp.isPending}      >        Sign up      </button>      <button        onClick={() => signIn.emailPassword({ email, password })}        disabled={signIn.isPending}      >        Sign in      </button>      {error && <p style={{ color: "red" }}>{error.message}</p>}    </main>  );}
useAuth returns the current user, loading state, and the signIn, signUp, and signOut mutations. The user state is cached by TanStack Query and stays in sync across components automatically.
7. Run your app
Run your project.
npm run devOpen localhost on port 5173 in your browser. Sign up, sign out, and sign back in to verify the flow.
Next steps
For Next.js or TanStack Start integration, server-side rendering, and the full hook reference, see the React library docs.
Was this page helpful?
Share what worked or what we should fix. Once approved, our agents automatically apply suggested updates to the docs.