Get started with Appwrite Realtime for Flutter_
Learn how to build a Flutter app using Appwrite's powerful Realtime API.

Realtime service is one of Appwrite’s most popular features. It allows you to subscribe and react to any Appwrite event using the Realtime API.
In this tutorial, we will get into the details and learn how to develop a Flutter app that leverages Appwrite's real-time capabilities.
Prerequisites
To continue with this tutorial, you'll need access to an Appwrite project. If you don't have one, you can sign up on Appwrite Cloud.
Set up a database
Once you have logged in to the Console and selected your project, click on Databases in the left sidebar of the dashboard.
On the databases page, click on the Create database button.
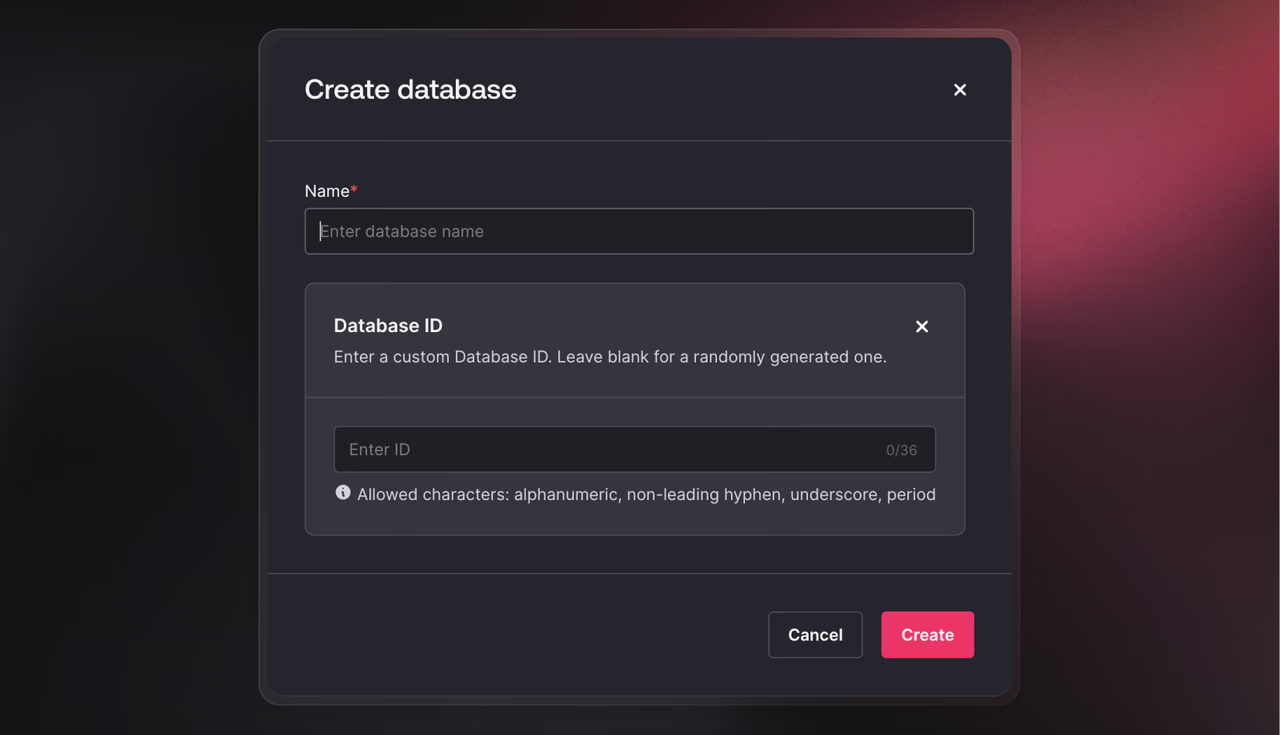
In the dialog that pops up, enter a name and database ID, and click Create to create the database and show the database page. Make sure to note down the database ID next to the database name as we will need that later in our code.
Once on the database page, click on the Create table button.
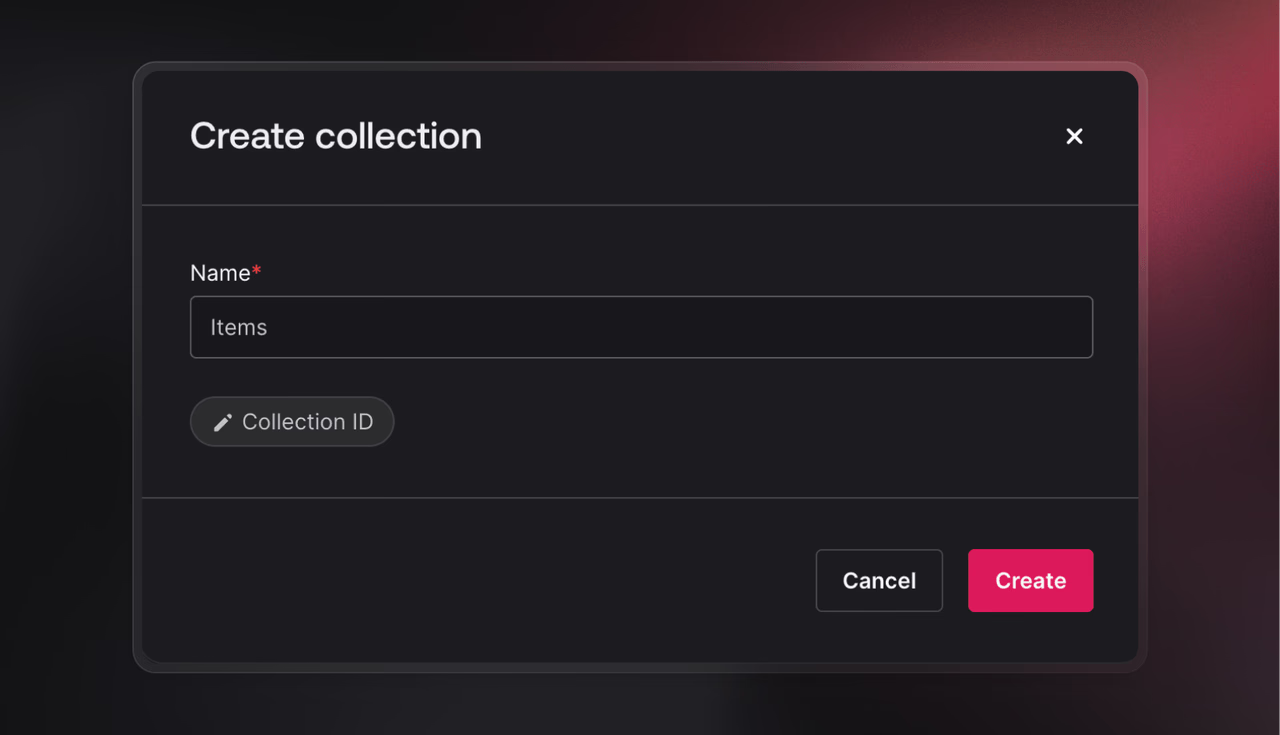
In the dialog that pops up, set the table name to Items and click on the Create button to create the table, and you will be redirected to the new table's page.
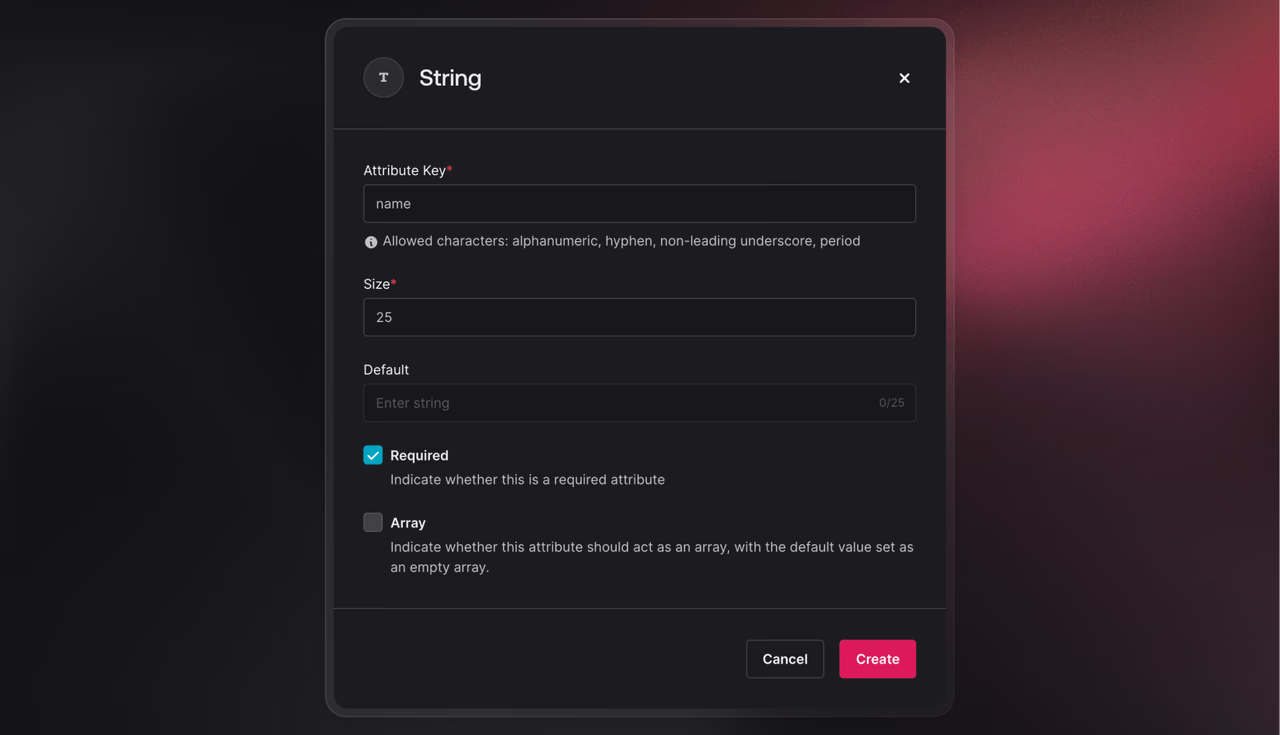
Switch to the Columns tab and create the following column. Also note down the Table ID from the top of the page next to the table name.
- Type: Text
- Column Key: name
- Default: null
- Required: true
- Array: false
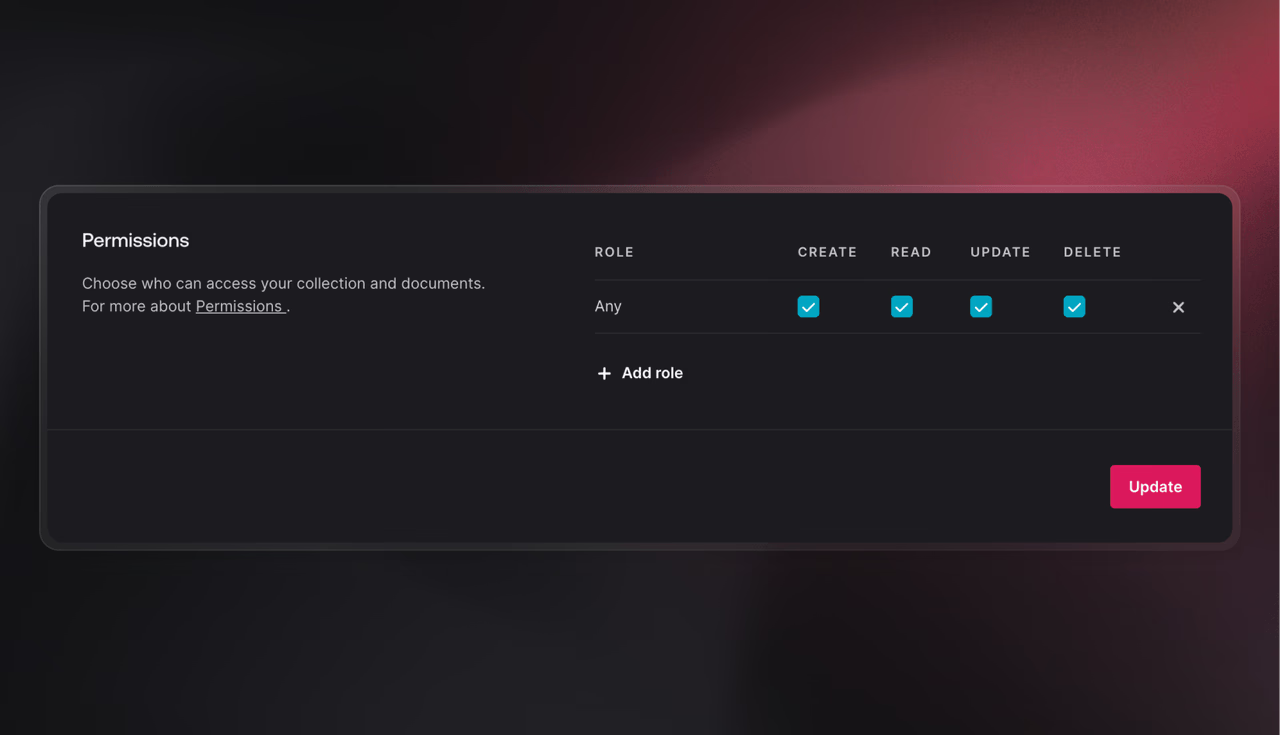
Switch to the Settings tab and scroll down to Permissions to configure the permissions for the table. Add the Any role and check create, read, update, and delete so that anyone can read and write.
Set up Flutter project and dependencies
We will begin by creating a new Flutter project. From your terminal in your project folder, type the following command to create a new Flutter project.
flutter create flappwrite_realtimeThen we add the Appwrite's SDK, to do that from your terminal, in your newly created project directory, type the following command:
cd flappwrite_realtimeflutter pub add appwriteThis command will add Appwrite's latest Flutter SDK with real-time service as a dependency to your Flutter project.
Once you have installed the dependency and run flutter pub get you should be ready to use it.
Add Flutter platforms
To initialize the Appwrite SDK and start interacting with Appwrite services, you first need to add a new Flutter platform to your project. To add a new platform, go to the Appwrite Console, select your project, and click the Add Platform button on the project Overview. Click on the Flutter app to register a Flutter platform.
In the wizard that appears, choose the platform you plan to run on. If you want to run on another platform, add another platform
If you choose to add an Android platform, on the dialog box, add the details. Add your app name and package name. Your package name is generally the applicationId in your app-level build.gradle
file. You may also find your package name in your AndroidManifest.xml file.
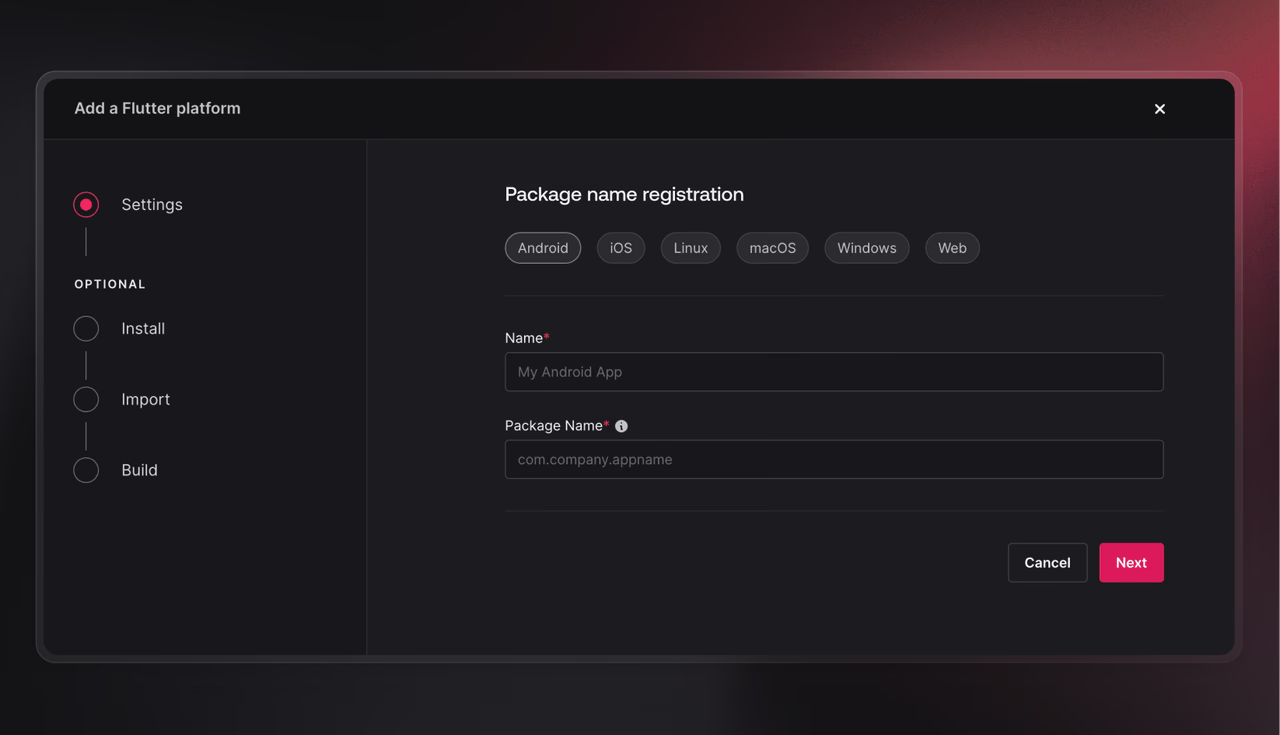
By registering a new platform, you are allowing your app to communicate with the Appwrite API.
Home page
We will start by creating a simple stateful widget that will list all the items from our items table and allow adding new items and deleting existing items. Our home page will also connect to Appwrite's Realtime service and display changes in the table of items by updating the UI as they happen. So, let's create our HomePage widget. Modify the code in lib/main.dart as follows:
import 'package:flutter/material.dart';
void main() {  runApp(const MyApp());}
class MyApp extends StatelessWidget {  const MyApp({super.key});  @override  Widget build(BuildContext context) {    return MaterialApp(      title: 'FlAppwrite Realtime Demo',      theme: ThemeData(        primarySwatch: Colors.blue,      ),      home: const HomePage(),    );  }}
class HomePage extends StatefulWidget {  const HomePage({super.key});  @override  State<HomePage> createState() => _HomePageState();}
class _HomePageState extends State<HomePage> {  List<Map<String, dynamic>> items = [];  final TextEditingController _nameController = TextEditingController();  @override  Widget build(BuildContext context) {    return Scaffold(      appBar: AppBar(        title: const Text('FlAppwrite Realtime Demo'),      ),      body: ListView(children: [        ...items.map((item) => ListTile(              title: Text(item['name']),            )),      ]),      floatingActionButton: FloatingActionButton(        child: const Icon(Icons.add),        onPressed: () {          // dialog to add new item          showDialog(            context: context,            builder: (context) => AlertDialog(              title: const Text('Add new item'),              content: TextField(                controller: _nameController,              ),              actions: [                TextButton(                  child: const Text('Cancel'),                  onPressed: () => Navigator.of(context).pop(),                ),                TextButton(                  child: const Text('Add'),                  onPressed: () {                    // add new item                    final name = _nameController.text;                    if (name.isNotEmpty) {                      _nameController.clear();                      _addItem(name);                    }                    Navigator.of(context).pop();                  },                ),              ],            ),          );        },      ),    );  }
  void _addItem(String name) {    setState(() {      items.add({'name': name, 'id': DateTime.now().millisecondsSinceEpoch});    });  }}
In the initState function of the HomePage, we will create and initialize our Appwrite client, as well as subscribe to real-time changes in rows in our items table.
  RealtimeSubscription? subscription;  late final Client client;
  @override  initState() {    super.initState();    client = Client().setProject('<PROJECT_ID>'); // your project id  }
And in dispose method, close the subscription.
dispose(){ subscription?.close(); super.dispose();}Now, let us set up different variables and functions to load the initial data, listen to changes in the table rows, and update the UI to reflect the changes in real time.
First, initialize our database ID and items table ID and set up a function to load initial data when the application first starts. For that, we will also set up an Appwrite TablesDB service.
  final database = 'default'; // your database id  final itemsTable = 'items'; // your table id  late final TablesDB tablesDB;
  @override  initState() {    super.initState();    client = Client().setProject('delete'); // your project id    tablesDB = TablesDB(client);    loadItems();    subscribe();  }
  loadItems() async {    try {      final res = await tablesDB.listRows(        databaseId: database,        tableId: itemsTable,      );      setState(() {        items =            List<Map<String, dynamic>>.from(res.rows.map((e) => e.data));      });    } on AppwriteException catch (e) {      print(e.message);    }  }
Now, we will set up our subscribe function, which will listen to changes to rows in our items table.
  void subscribe() {    final realtime = Realtime(client);
    subscription = realtime.subscribe([      Channel.tablesdb(database).table(itemsTable).row().toString()    ]);
    // listen to changes    subscription!.stream.listen((data) {      // data will consist of `events` and a `payload`      final event = data.events.first;      if (data.payload.isNotEmpty) {        if (event.endsWith('.create')) {          var item = data.payload;          items.add(item);          setState(() {});        } else if (event.endsWith('.delete')) {          var item = data.payload;          items.removeWhere((it) => it['\$id'] == item['\$id']);          setState(() {});        }      }    });  }
Finally, let's modify our _addItem function to add items to Appwrite's table and see how the view updates in real time.
void _addItem(String name) async { try { await tablesDB.createRow( databaseId: database, tableId: itemsTable, rowId: ID.unique(), data: {'name': name}, ); } on AppwriteException catch (e) { print(e.message); } }Let us also modify our ListTile widget to add a delete button that will allow us to delete the item.
ListTile( title: Text(item['name']), trailing: IconButton( icon: const Icon(Icons.delete), onPressed: () async { await tablesDB.deleteRow( databaseId: database, tableId: itemsTable, rowId: item['\$id'], ); }, ), )Complete example
import 'package:appwrite/appwrite.dart';import 'package:flutter/material.dart';
void main() {  runApp(const MyApp());}
class MyApp extends StatelessWidget {  const MyApp({super.key});
  @override  Widget build(BuildContext context) {    return MaterialApp(      title: 'FlAppwrite Realtime Demo',      theme: ThemeData(        primarySwatch: Colors.blue,      ),      home: const HomePage(),    );  }}
class HomePage extends StatefulWidget {  const HomePage({super.key});
  @override  State<HomePage> createState() => _HomePageState();}
class _HomePageState extends State<HomePage> {  List<Map<String, dynamic>> items = [];  final TextEditingController _nameController = TextEditingController();  RealtimeSubscription? subscription;  late final Client client;  final database = 'default'; // your database id  final itemsTable = 'items'; // your table id  late final TablesDB tablesDB;
  @override  initState() {    super.initState();    client = Client().setProject('delete'); // your project id    tablesDB = TablesDB(client);    loadItems();    subscribe();  }
  loadItems() async {    try {      final res = await tablesDB.listRows(        databaseId: database,        tableId: itemsTable,      );      setState(() {        items =            List<Map<String, dynamic>>.from(res.rows.map((e) => e.data));      });    } on AppwriteException catch (e) {      print(e.message);    }  }
  void subscribe() {    final realtime = Realtime(client);
    subscription = realtime.subscribe([      Channel.tablesdb(database).table(itemsTable).row().toString()    ]);
    // listen to changes    subscription!.stream.listen((data) {      // data will consist of `events` and a `payload`      final event = data.events.first;      if (data.payload.isNotEmpty) {        if (event.endsWith('.create')) {          var item = data.payload;          items.add(item);          setState(() {});        } else if (event.endsWith('.delete')) {          var item = data.payload;          items.removeWhere((it) => it['\$id'] == item['\$id']);          setState(() {});        }      }    });  }
  @override  dispose() {    subscription?.close();    super.dispose();  }
  @override  Widget build(BuildContext context) {    return Scaffold(      appBar: AppBar(        title: const Text('FlAppwrite Realtime Demo'),      ),      body: ListView(children: [        ...items.map((item) => ListTile(              title: Text(item['name']),              trailing: IconButton(                icon: const Icon(Icons.delete),                onPressed: () async {                  await tablesDB.deleteRow(                    databaseId: database,                    tableId: itemsTable,                    rowId: item['\$id'],                  );                },              ),            )),      ]),      floatingActionButton: FloatingActionButton(        child: const Icon(Icons.add),        onPressed: () {          // dialog to add new item          showDialog(            context: context,            builder: (context) => AlertDialog(              title: const Text('Add new item'),              content: TextField(                controller: _nameController,              ),              actions: [                TextButton(                  child: const Text('Cancel'),                  onPressed: () => Navigator.of(context).pop(),                ),                TextButton(                  child: const Text('Add'),                  onPressed: () {                    // add new item                    final name = _nameController.text;                    if (name.isNotEmpty) {                      _nameController.clear();                      _addItem(name);                    }                    Navigator.of(context).pop();                  },                ),              ],            ),          );        },      ),    );  }
  void _addItem(String name) async {    try {      await tablesDB.createRow(        databaseId: database,        tableId: itemsTable,        rowId: ID.unique(),        data: {'name': name},      );    } on AppwriteException catch (e) {      print(e.message);    }  }}
Conclusion
I hope you enjoyed learning and building Flutter applications with Appwrite Realtime service.
If you have any questions, feel free to ask on our Discord server. You can also share your apps built Flutter and Appwrite Realtime on Built with Appwrite, and we'll feature it on our socials!
Happy coding!